Open MyDash for the first time
The very first time you open MyDash, the app creates a personal dashboard for you and seeds it with a default widget bundle so you have something to look at right away. This page is a tour of what's on screen.
Goal
Recognise the parts of the MyDash workspace and know where to find the controls you'll use in every other tutorial.
Steps
1. Click the MyDash icon in the Nextcloud app launcher
Or visit /apps/mydash/ directly. After a moment of loading you land on My Dashboard with the default widget bundle already in place:
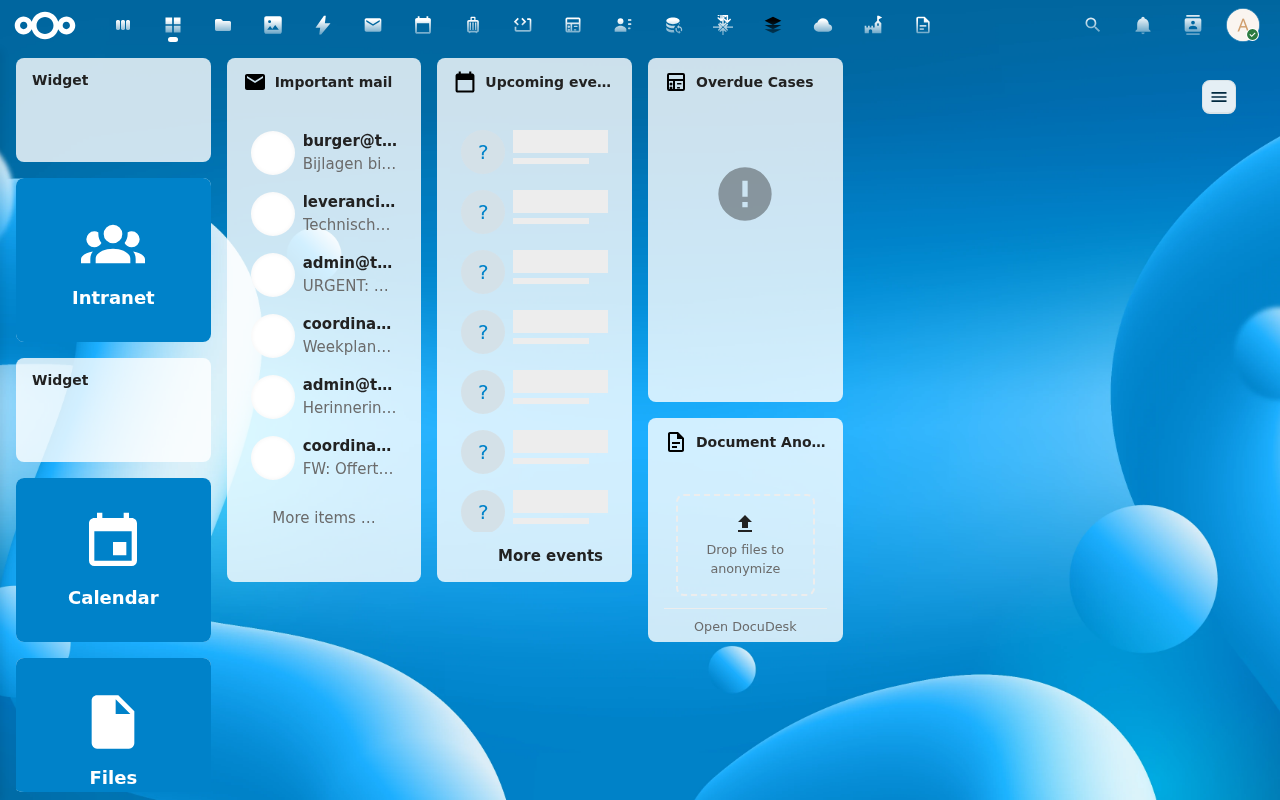
The bundle ships with three preconfigured tile widgets on the top row — Conduction, Sendent, and Nextcloud — plus a Files widget below.
2. Open the dashboard sidebar
Click the hamburger button in the top-right to slide out the sidebar:
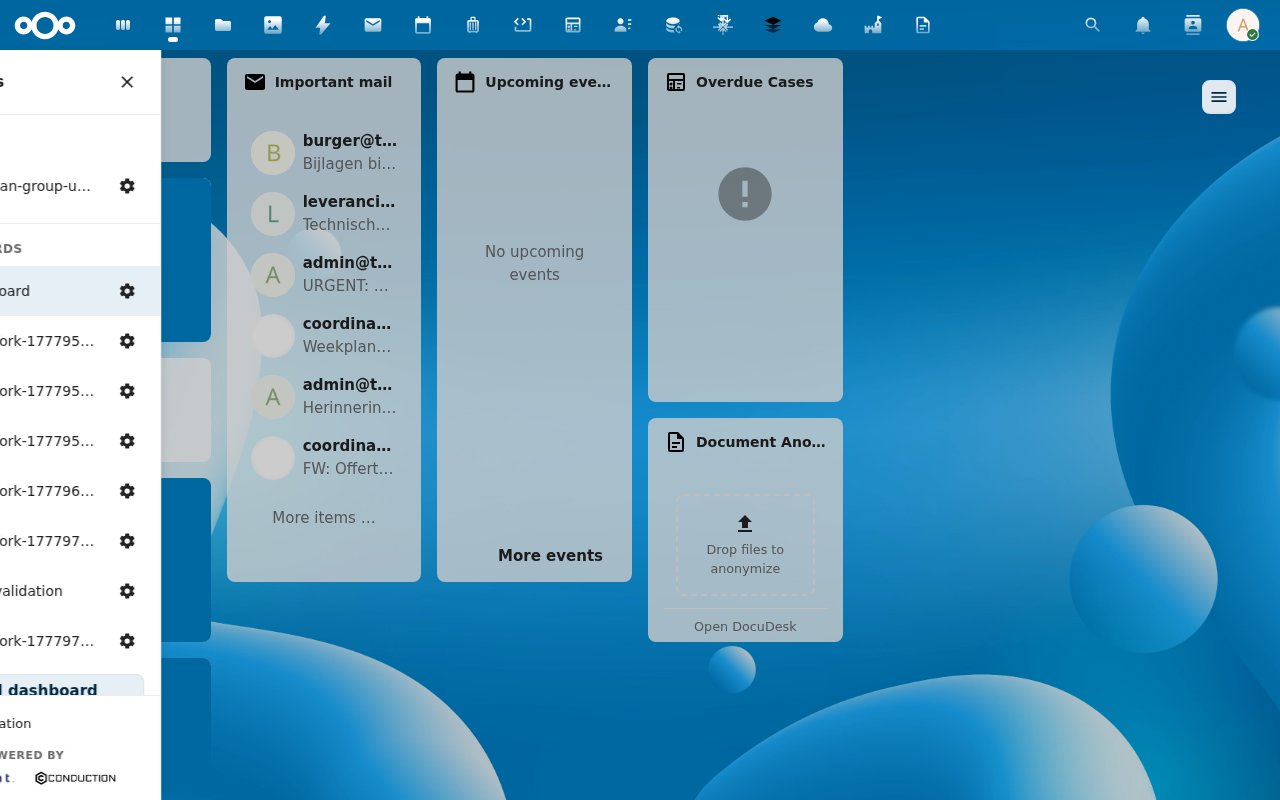
The sidebar is your jumping-off point for everything — switching between dashboards, creating new ones, configuring an existing one, and pinning a default.
3. Scan the sidebar layout
Three sections, top-down:
- DEFAULT — group-shared dashboards your administrator marked as defaults for your group. Read-only by default.
- MY DASHBOARDS — your personal dashboards. The currently-active one is highlighted in primary colour.
- Powered by footer — brand attribution, doesn't affect functionality.
A ★ next to a row marks that dashboard as your default — the one MyDash opens automatically when you visit /apps/mydash/ cold. See Set a default dashboard.
4. Open a dashboard's cog menu
Each row carries a cog (⚙️) on the right. Click it for the per-dashboard action menu:
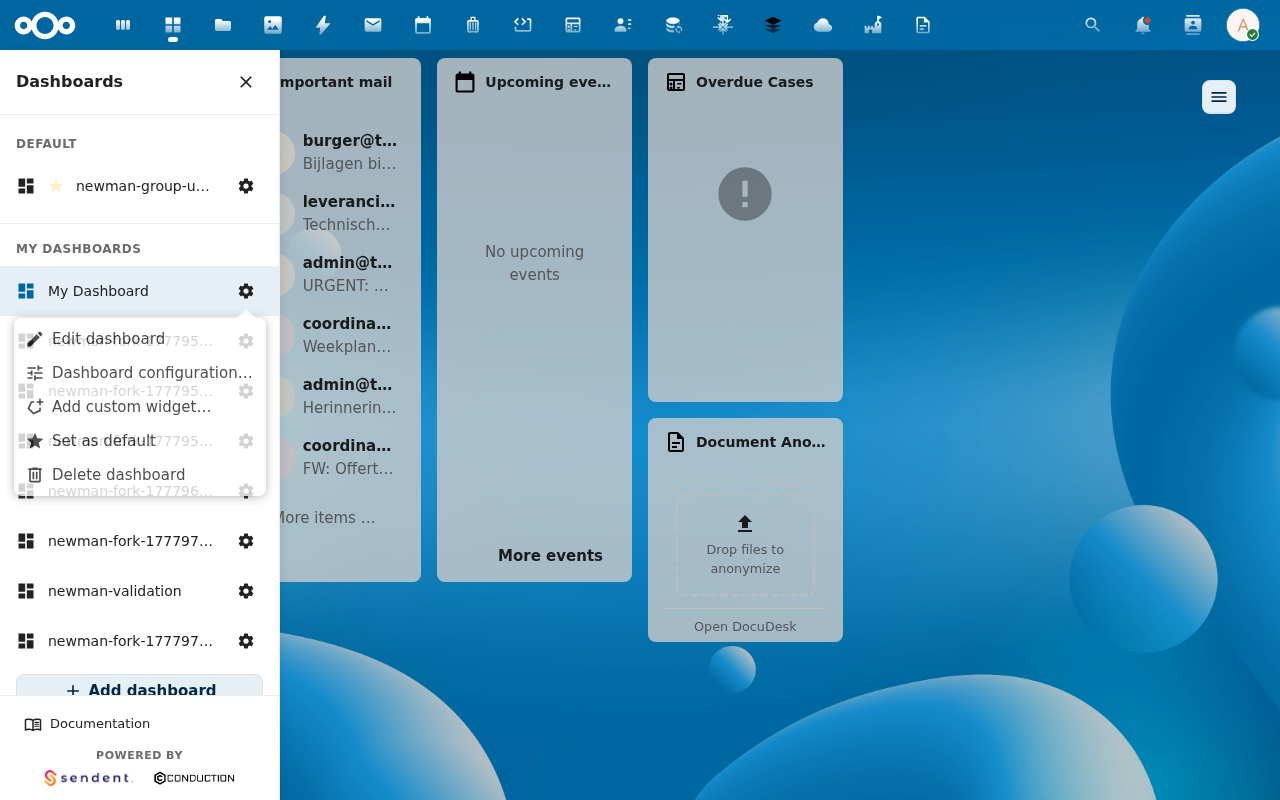
From here you can edit the layout, configure metadata, add custom widgets, pin as default, and delete. Most of the rest of the user guide is built around these actions.
What's next
- Create a new dashboard — start with a fresh canvas.
- Add a widget — drop content blocks onto a dashboard.